default

2012-07-09 Supercharged Joule Thief – Reduced Brightness

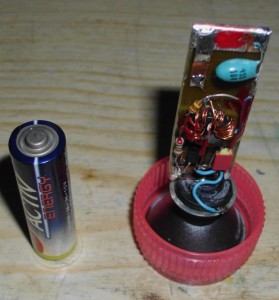
Peter is experimenting with my Supercharged Joule thief circuit.  His picture is one of his recent results: a Supercharged Joule Thief flashlight.  I quote:

Hello and thanks for the fast answer,

Now I want an SJT as a nightlight cause there are many so called “depleted” batteries lying around – I built one on breadboard with a blue LED but it was too bright!
Is there a possibility to regulate or decrease the brightness?

Of course I give you permission to use this in your blog! At the moment I´m using two old AA cells in parallel which should give me enough energy for a decent time.
I understand the tweak with the resistor but have a question on the capacitor: “Should I measure the current the circuit consumes and choose the one which makes it consume the least?”  Is this what you meant?

Thanks

Peter

Peter:

Increase the 1.5k resistor to 3.3k, 4.7k, or higher, until you have the desired LED brightness.  This may change the optimum point, so the 680pF or whatever capacitor may not be the best choice.  The peak of the optimum point is very broad, so adjusting the 680pF may not have a large effect.  But I think that it is always a good idea to tune the SJT to save battery current.  And that is especially important when you are using button cells.  Thanks for the pictures.  I haven’t had time to work on my blog, but when I do, I’ll try to update it with your pictures

I put a 1 ohm resistor in series with the LED cathode.  I measure the millivolts across it, and each millivolt is equal to 1 milliamp.  Then as the capacitor is changed, the LED current will have a broad peak.  I put ten 100 pF disk capacitors in parallel on a PC board with each capacitor connected to one of the switches on a 10  position DIP switch.  I can then switch on the capacitors so they add up to 1000 pF.  For the 1.5k, I’ve found that the capacitor is typically between 560 pF and 1000 pF, depending on the coil and current.  Typically the core I use is the Fair-Rite 2673002402 with ten to 12 turns of 24 AWG (0.5mm) wound bifilar.  The inductance of each winding is typically above 200 microhenrys.  The Supercharged Joule Thief circuit runs at 3 or 4 times the frequency of a typical conventional JT – maybe 200 to 250 kHz.

More experimenting?  Probably.

default

2012-07-08 Honeywell Mainframe 1981

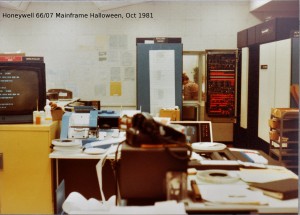
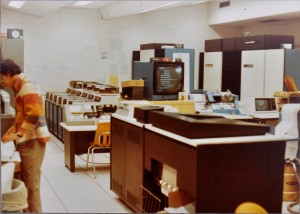
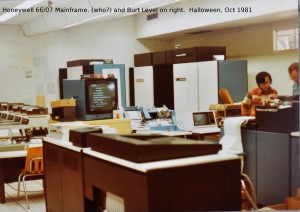
Honeywell Level 66, model 66/07. Had 384k words of memory. One word = 36 bits, so it was 1.25 megabytes. Five disk packs (removable). Three tape drives. Line printer in foreground. The video screen sitting on the mustard colored cabinet displayed all the jobs running along with their priority. Sometimes the students would be on timeshare and slow down the batch jobs especially the printer. So Burt, the daytime operator, would reduce timeshare’s priority and slow it down in order to stop the printer from slowing down. The students probably weren’t happy, but they were hogging the CPU time.

The F.E.s (field engineers) often left the door to the CPU open to let cool air in. The rows of lit LEDs on the door displayed the various registers to allow troubleshooting. The boards were not printed circuit, they were wire wrapped boards to allow making changes in the field. The small number of Honeywell mainframes and the various sizes and versions meant that that it was not cost effective to manufacture printed circuit boards for each machine.

I have a lot of other stories about the “Honey ain’t so well” mainframe and those times

default

2012-07-07 Honeywell Mainframe, Infotron 1981

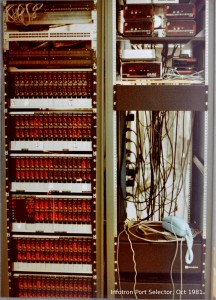
The Infotron port selector (used by students) became intermittent and unreliable as it was expanded and was soon replaced by the Gandalf Data, Inc. port selector.  No amount of troubleshooting and long periods of long distance calls to Infotron in New Jersey could get the problems fixed.

default

2012-07-06 SAC Computer Center, Level 6 minis Oct 1981

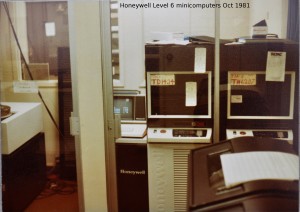
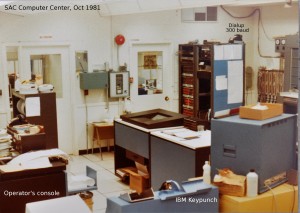
The Honeywell minicomputers were located in the room next door, behind the left door.  My shop was behind the right door.

The level 6 minis (behind the sliding glass doors) had Multics OS, and had a 4 character hexadecimal memory display and keypad on the protruding ‘ledge’.  When the Level 6 crashed, it would jump to a memory location and halt.  The hex display would then display that location: DEAD.

default

2012-07-05 SAC Registration Jan 1982

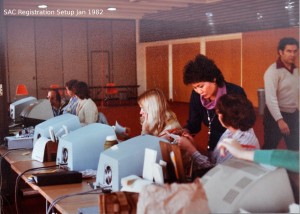
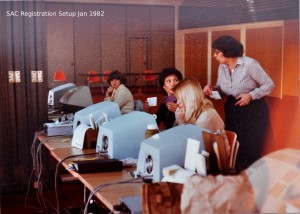
Santa Ana College Registration setup, Jan 1982,  The old blue terminals were Lear Siegler ADM-1A, the newer beige terminals were ADM-31.

default

2012-07-04 SAC Student Lab, Registration 1982

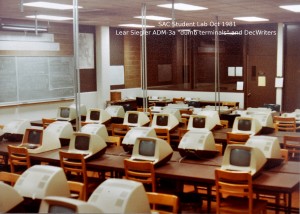
SAC Student Lab with ADM3a dumb terminals and DecWriter printer terminals.  Registration (Ann Thompson standing).

default

2012-07-03 SAC Student Lab, Halloween 1981

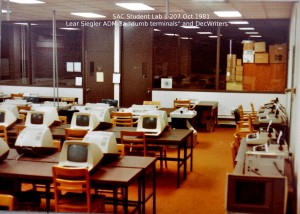
SAC Student Lab, second floor of the Neally Library, L-204.

Halloween 1981 Curt helps Carolyn with her vampire nails.

default

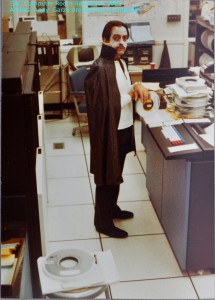
2012-07-01 Halloween 1981 Janice and Denise, Andy

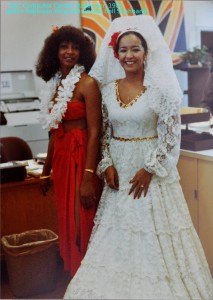
Halloween 1981. Ja9nice (Robinson at that time) King as Hawaiian girl, Denise (Bell at that time) Shahbandi as Mexican Senorita. Andres ‘Andy’ Garza as Dracula (he was on night shift!)

default

2012-06-30 Make a Calcium Carbide Cannon

on June 30th, 2012 by - Comments Off on 2012-06-30 Make a Calcium Carbide Cannon

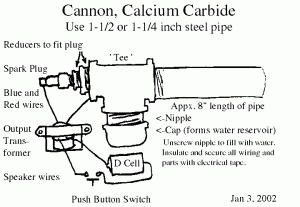
Long ago there were ads in the back of magazines (especially hunting and gun mags) that offered a ‘toy’ called a Bangsite Cannon (these are still available today).  What I’m describing is the way I remember it, but I don’t know if it’s the same today (it looked like the 10FC model). It’s made out of sheet metal and cast metal, and comes in various sizes, one having a barrel about a foot (30 cm) long. There is a cavity low in the breech behind the barrel, which holds a small amount of water.  You buy a tube of Bangsite, which is granules of calcium carbonate.  When Bangsite contacts water, it turns to a white powder and releases acetylene, which is what is used in welding torches, and also miner’s lanterns.  When mixed with air, acetylene is explosive, hence the name Bangsite.

My high school buddy and his brothers bought one, and we had a lot of fun with it.  I decided that I wanted one, too, but I decided to make mine (see the photo).  The bangsite cannon has a flint and wheel just like a cigarette lighter, and it is on a removable cover that fits in the hole over the water cavity.  You can remove the cover and drop a few granules of Bangsite into the water, then screw the cover back on, and shen you spin the wheel, the resulting sparkes ignite the acetylene and the cannon makes a loud bang, and smoke comes out of the barrel.  When you remove the cover to p[ut more Bangsite in, you blow in the cavity to give it fresh air.

Mine was made of regular galvanized pipe and plumbing fittings with the result that it was much heavier.  But its advantage was that it didn’t use a flint, which wore out, and the switch made it more like a regular cannon in that it fired whenever the “trigger” or pushbutton switch was pressed and released.

The transformer was out of an old five tube AM radio and it was for a 50C5 tube, which uses a transformer with a 2.5k primary and a 4 ohm speaker winding (Today, the battery, transformer and pushbutton could be replaced with the spark generator out of a barbecue lighter).  Since today this transformer has become very rare, I think a 120VAC to 12VAC power transformer might work okay.

Today, in addition to the changes I mentioned above, the plumbing fittings could be heavy plastic pipe.    But if plastic pipe is used, the nipple and cap, which creates the cavity, must have threads so they can be removed for cleaning out the water and spent carbide.    It is very bad for the water to get on the spark plug contacts; it will cause the porcelain to conduct and there will no longer be a spark.

We quickly got really tired of spending a lot of money on the Bangsite, so we found a place where we could buy a tin of calcium carbide that is used for a miner’s lamp.  The granules are larger so when they get wet, they don’t disappear so fast and will bubble and sizzle for awhile, so one can then blow some fresh air into the cannon and get another bang out of it.  You might think that you can just crush the larger granules with a hammer or something, but calcium carbide ranks in hardness high up there with silicon carbide, which is used for making grinding wheels.

One other thought: this could be misconstrued to be a forbidden explosive device, such as a pipe bomb.  The commercially made ones are purposely made to look like a toy cannon, so they don’t have the chance of being misconstrued.  My disclaimers really do apply here (see my website).

default

2012-06-29 Buck 9V to 5V DC-DC Converter

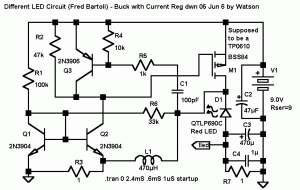
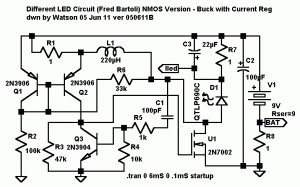
I drew these in SWCAD III back in 2005.  I  haven’t built it yet.  The original used a PMOS FET,  I just wanted to put out a version that uses a much easier to get NMOS FET.

© RustyBolt.Info/wordpress
CyberChimps