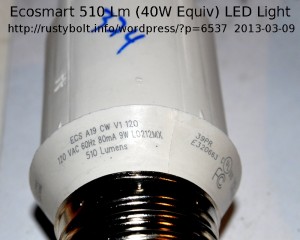

 I bought an EcoSmart 40 watt equivalent LED light bulb from Home Depot on sale for under $12, regularly $20. It is very similar to this one (I couldn’t find it on Home Depot’s website). It was a bright white, which seems to be the only color they have on the shelves. Apparently all of the warm white LED lights sell out soon after they’re put on the shelf. I got it just to see what’s inside, since I already have more than a dozen of the Philips L Prize LED lights. One thing that mystified me was that the package said it was 8 watts, but the light itself was labeled 120VAC, 80 mA, 9 watts. Now 120 Volts times 80 milliamps equals 9.6 watts. I’m just wondering which of the three is the most accurate.
I think every LED light I’ve examined has had a largish heatsink, typically made of heavier metal, maybe zinc. The LEDs really need it when they’re in a fixture which typically has no ventilation, since almost every fixture was designed for incandescent or filament lights which work just fine when they’re really hot. It’s the same with this EcoSmart light.
I pried the flattened out plastic diffuser cover off of the finned metal heatsink by sticking a small screwdriver into the places where there was a space for the plastic tabs to catch on the metal. I got it off without damaging any of the plastic tabs. This diffuser consisted of two parts; the flattened globe itself, which was translucent, and loose inside was an opaque white reflector and diffuser.
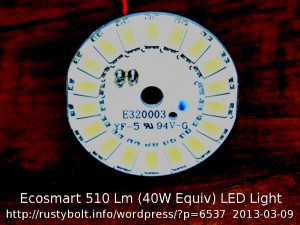
Inside was a disk full of surface mounted LEDs, each one rectangular in shape and they were all mounted in a circle just inside of the edge of the disk. The LED light came straight out of the LEDs toward the end of the bulb and the opaque diffuser reflected most of it 90 degrees outward toward the circumference of the bulb. I think this was not a very efficient way, since the diffuser absorbs some of the light.
In the middle of the disk was a thick plastic washer with a bite taken out of it for the two solder joints for the power pins. It was held on with a pop rivet, so I drilled out the center of the pop rivet and it came off. I removed the plastic washer, which had white heatsink goop on it, so it was beginning to get messy. The disk was still held firmly against the finned heatsink.
I unsoldered the two power pins by sucking out the solder with a solder sucker. When the pins were free, the disk came off easily with lots of messy white heatsink goop. I used up several paper towels getting rid of all the white stuff. Luckily it was still new, and not all baked on like often happens with a typical power transistor and heatsink.
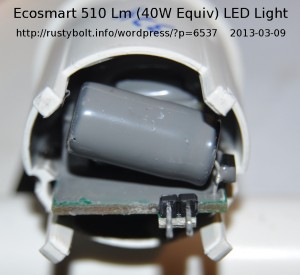
The two power pins projected through a hole in the finned metal heatsink, so I couldn’t see much down below. There were four plastic tabs engaged to the heatsink so I got four small screwdrivers and pried the tabs away from the heatsink. When the fourth one came free, the heatsink started to slide off the plastic base, where all of the circuitry was located, along with the bulb’s screw base. I removed the finned heatsink, and the cylindrical base was exposed, and I could see inside of the base where all of the components were. But I was disappointed to find that they were all covered in a thick layer of gray epoxy, sealed inside of the mess. That was apparently why the bulb said that it was suitable for damp locations.
I was planning to be able to trace out the circuit and find out how it worked. But it’s all covered up, and without a chisel and hammer, I probably can’t do anything with it. I will try to measure the voltage when the power pins are connected to the LEDs, but that’s about it. I could mount the LED disk on a flat surface, big enough to sink away the heat. Then I could run a pair of wires from the disk to the power pins, which would be located where there was more room. I could mount a few of the disks on the wall, and run the pairs down to the floor to a set of sockets. But the light would be very bright, since the plastic diffuser would not be there. Also, the LEDs are probably not isolated from the 120VAC power, so the disks would have to be insulated and protected from contacting anything.
Update Mar 8 – I examined the disk with the LEDs, and connected it to the power supply. I found that there were two halves of the circle, each filled with 9 LEDs in series. These halves are connected in parallel. The circuit board where the pins come out was conveniently marked with a + and – so there was no doubt about the polarity of the DC. When I turned up the power supply, the LEDs started putting out bright light when the voltage got up to the 28 to 30 volt range. The current was several hundred mA. But I didn’t know how much current should be going through the LEDs, and the disk was getting hot really fast with no heatsink, so I shut it off.
Update Mar 17 – I bought some paint stripper that was supposed to strip epoxy, and poured a half cup into a glass jar. I put the base into the glass jar, with the epoxied end down, and let it soak for several days. I pulled it out, wiped it off, and sawed slots along the side, lengthwise. I pulled the metal screw base off and snapped it apart, and got some of that stripper on my hands, and it started to sting. Washing my hands helped, and I managed to get the circuit board out. I used a small nail to pry out bits and pieces of the epoxy, which was softened into a rubbery like consistency, sort of like an eraser. Most of it came out of the cracks and off the circuit board. I was surprised that the stripper didn’t damage the board or the parts on it.