


I ordered these kits Several weeks ago and they finally arrived today. I opened up the package and found several parts rattling around loose in the box. I found one bag had been cut open, and whoever slit it didn’t tape or staple it closed.
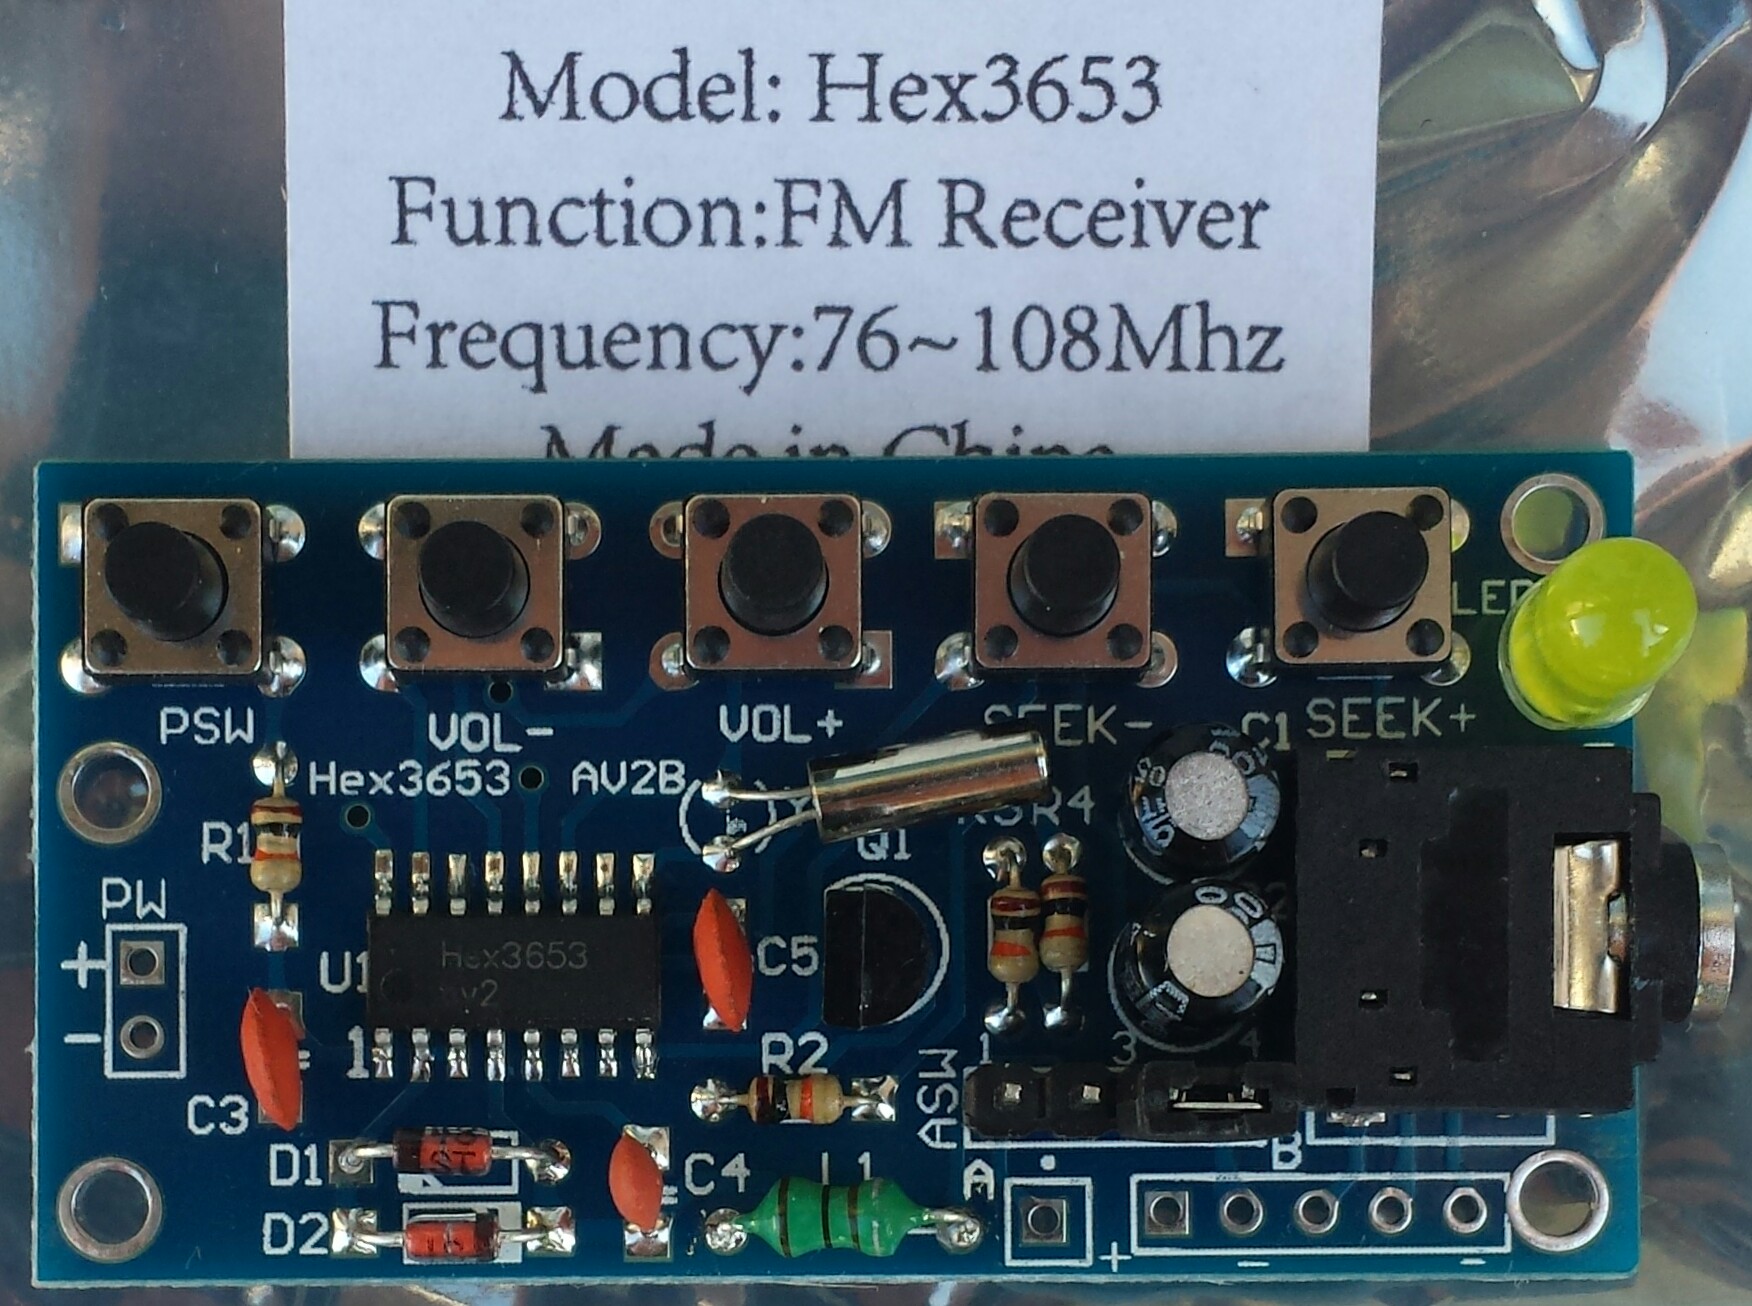
I got to work and assembled one of the kits still sealed in its bag. It didn’t go as well as I had expected. There are no instructions with each kit, so I searched for Hex3653 receiver and found an article on eBay that looked like it could help. It gave the location of several of the components, but the board I had wasn’t the same and used some different parts. I put in what looked the same then puzzled out what was left. Later I found goughlui.com, which was much more helpful.
Discrepancies
The eBay board had only 2 resistors, one 10k and the other 2.2k. But I had four resistors, all 10k. I don’t know why mine didn’t have a 2.2k, but having four 10k resistors all the same made the choice very simple.
Antenna
I had to figure out what the four pins and jumper do. But the above website helped a lot. The four pins are labeled ASW, which I’m guessing means antenna switch. One way makes the earphone cord the antenna, the other is a separate wire.
Performance
It comes with a two AA cell battery holder, so I soldered it to the PW holes on the left. I put cells in the holder, plugged in some earbuds, pushed a few pushbuttons and received a station. I moved the jumper to the left and the station got louder, so I guess that was the one for the headphone cord antenna. It works okay even though I wasn’t sure if I had put all the parts in their proper places. Yay! Now I can assemble some others.
Conclusion
I agree with the conclusion in the goughlui website. This receiver has a loud pop when turned on, and the volume has too much change between steps. If you plug this into a powerful stereo system, it could damage speakers or even more.
When the seek buttons are pressed, the seek is muted, but since there is no display, the next station is unknown until the station verbally identfies itself. A display would help a lot, but it’d be more expensive.
The instructions are nonexistent, but through my previous experience I was able to get through with no problems. Because of this, and the soldering of the tiny SMD chip, I don’t recommend this for beginners, and hopefully the goughlui.com website and my blog will help future experienced assemblers get through this project without problems.


